.png)


.png)

Living on the Western Slope means dealing with a climate of extremes, and a mini-split system is a fantastic solution for year-round comfort. It’s no wonder so many homeowners are interested in them. If you have a can-do spirit, the thought of a DIY mini split a c installation has likely crossed your mind. While it’s a tempting project, it comes with unique challenges, from ensuring the outdoor unit can handle our winter snow to choosing a system that’s efficient in our dry summer heat. This guide breaks down what a successful installation looks like in our region, helping you manage the specifics so you can stay comfortable no matter the season.
Key Takeaways
- Professional Installation Protects Your Investment: While a DIY project seems tempting, installing a mini-split involves high-voltage electricity and regulated refrigerants; hiring a licensed professional ensures the job is done safely, keeps your warranty valid, and prevents costly mistakes.
- Proper Sizing and Placement Are Crucial: Before installation, focus on planning, as a unit that is too big or too small will be inefficient and uncomfortable. Correctly placing the indoor and outdoor units is just as important for optimal airflow and system performance.
- Simple Maintenance Ensures Long-Term Performance: Keep your mini-split running efficiently by cleaning the filters monthly and checking the drain line for blockages, but for long-term health and reliability, schedule an annual tune-up with a professional to handle the more technical checks.
What Is a Mini-Split and How Does It Work?
If you’ve ever wished you could cool or heat a specific room without installing a whole new set of air ducts, a mini-split system might be exactly what you’re looking for. At its core, a ductless mini-split is a heating and cooling system that manages the temperature in individual rooms or zones. It’s a fantastic solution for home additions, converted garages, or older homes on the Western Slope that were built without ductwork.
The system has two main parts that work together: an indoor unit that you see mounted on the wall and an outdoor unit that sits outside your home. These two components are connected by a small bundle of pipes and wires that run through a three-inch hole in the wall, making installation much less invasive than a traditional central air system. This simple but effective design is what makes it possible to get targeted comfort right where you need it. Now, let’s look at how each part plays its role.
How the Outdoor Unit Works
Think of the outdoor unit as the engine of your mini-split system. This component, which is technically a condenser, sits on a flat, stable surface outside your house. Its primary job during the summer is to release the heat that the indoor unit has collected from your home’s air. As the refrigerant from the indoor unit flows into the condenser, a fan blows air across the coils, dissipating the heat into the outdoor air. For this process to work efficiently, the unit needs plenty of space for air to circulate. It’s a key part of how ductless mini-splits operate to keep your home cool.
How the Indoor Unit Works
The indoor unit is the part you’ll interact with most. This sleek, quiet appliance is responsible for pulling warm, humid air from the room and blowing cool, comfortable air back into it. Inside the unit, the warm air passes over a set of cold evaporator coils filled with refrigerant. The refrigerant absorbs the heat from the air, which effectively cools and dehumidifies the room. The indoor unit is mounted securely on a wall inside your home, placed in a spot that allows for the best airflow and easy access for cleaning the filter. A fan then sends the newly chilled air back into your living space.
How They Team Up to Cool Your Home
The magic of a mini-split happens when the indoor and outdoor units work together. They are connected by a set of refrigerant lines and electrical wiring, which allows for the constant transfer of heat. The refrigerant acts like a sponge, absorbing heat inside your home and then traveling to the outdoor unit to squeeze it out. This cycle continues, creating a consistently cool environment. This collaboration between the units is what allows for such precise temperature control and incredible energy efficiency. When installed correctly, the system is a closed loop, ensuring the refrigerant levels are correct and the system runs at peak performance for years.
Why Western Slope Homeowners Love Mini-Splits
From Grand Junction to Montrose, more and more homeowners are choosing mini-split systems for year-round comfort. These versatile units are a fantastic fit for the unique challenges of Colorado living, offering a modern alternative to traditional HVAC. They provide a level of flexibility and performance that older systems often can't match, making them a popular upgrade for new constructions and historic homes alike. If you've seen those small, wall-mounted units and wondered what the fuss is about, here’s why your neighbors are making the switch.
Mini-splits, also known as ductless heat pumps, are a great match for the Western Slope lifestyle. They offer precise control, high efficiency, and a single system for both heating and cooling, which is perfect for our dramatic temperature swings. Whether you live in a historic home that can’t accommodate ductwork, are building a new energy-conscious house, or simply want to make a specific room more comfortable, a mini-split can be the perfect solution. They give you the power to customize your home’s climate without the cost and disruption of a major renovation. Below, we’ll explore the specific reasons these systems are quickly becoming a local favorite.
Get Greater Energy Efficiency
Mini-splits are designed to be incredibly efficient. Unlike traditional systems that cycle on and off, mini-splits use inverter technology to adjust their speed continuously, using only the energy needed to maintain the desired temperature. This results in lower electricity consumption and a smaller environmental footprint. While the initial investment can vary, mini-splits can be a more affordable option than central air if your home doesn't already have ductwork. By delivering conditioned air directly into a room, they also avoid the energy losses associated with ducts, which can account for more than 30% of a home's energy use for air conditioning.
Control Temperatures Room by Room
One of the biggest advantages of a mini-split system is the ability to create temperature zones. Each indoor unit has its own thermostat, allowing you to cool your living room to a crisp 68 degrees while keeping an unused guest room warmer. This room-by-room control is perfect for families with different temperature preferences or for homes with areas that are hard to heat or cool, like a sunroom or a finished basement. As one expert from Carrier notes, this flexibility is a key reason people choose mini-splits, especially when they want to control the temperature in specific areas.
Skip the Ductwork
As the name "ductless mini-split" implies, these systems don't require a network of ducts to deliver conditioned air. This makes them an ideal solution for homes without existing ductwork, such as older houses or properties with boiler-based heat. Installing ducts can be an expensive, messy, and disruptive process. A ductless mini-split AC bypasses this entirely, requiring only a small, three-inch hole in the wall to connect the indoor and outdoor units. This makes them perfect for home additions, converted garages, or any space where extending ductwork isn't practical.
Heat and Cool with One System
Mini-splits are a true two-for-one solution. They are a type of heat pump, which means they can provide both heating and cooling from a single unit. In the summer, the system pulls heat from inside your home and moves it outside. In the winter, it reverses the process, extracting heat from the outside air (even on cold days) and bringing it inside. This all-in-one functionality is perfect for the Western Slope's varied climate, giving you a reliable source of comfort all year. It simplifies your home's mechanical systems and ensures you're prepared for whatever the Colorado weather brings.
Your Toolkit for Mini-Split Installation
Getting your tools and materials organized before you start is one of the best things you can do for a smooth installation. Think of it like prepping your ingredients before you start cooking a new recipe. It saves you from making frantic trips to the hardware store and helps you focus on doing each step correctly. A mini-split installation requires more than just your basic toolbox; you’ll need some specialized equipment to handle refrigerant lines and electrical connections properly. Having everything laid out and ready to go will make the entire process feel much more manageable. Let's walk through exactly what you'll need to have on hand.
Mounting Hardware
First up is securing the indoor and outdoor units. For the indoor unit, you’ll rely on the provided wall bracket, a stud finder, a level, and a drill. Your main goal is to find the wall studs and anchor the bracket directly to them. This provides the most secure support for the unit. If the studs don't line up perfectly with where you want to place the unit, you'll need heavy-duty wall anchors rated for the unit's weight. But honestly, hitting the studs is always the best-case scenario. A level is crucial here; a slightly crooked unit can affect how the condensation drains, so take your time to get it perfectly straight.
Refrigerant and Line Set Essentials
The line set is the bundle of lifelines connecting your indoor and outdoor units. It typically contains two copper refrigerant pipes, electrical control wires, and a condensate drain hose. You’ll need to carefully bundle these components together. To keep them protected from weather and physical damage, you'll wrap the entire bundle tightly with protective PVC line-set tape. Handling the copper tubing requires a gentle touch, as kinking it can restrict refrigerant flow and seriously impact your system's performance. This is one of those steps where patience and precision really pay off.
Electrical Supplies
Connecting the electrical components is a critical part of the installation. You'll be running communication and power wires from the indoor unit to the terminal block on the outdoor unit. This is where attention to detail is non-negotiable. You must match the wire colors perfectly according to the manufacturer's diagram. Getting this wrong isn't a minor mistake; it can cause system errors or even permanently damage the electronic components of your brand-new system. If you have any hesitation about working with wiring, this is a good moment to pause and assess your comfort level with the task.
Tools for a Perfect Seal
Unless you've purchased a specific "no-vac" or pre-charged DIY kit, you'll need to create a perfect seal in the refrigerant lines. This requires specialized tools: a vacuum pump and a manifold gauge set. Before you open the refrigerant valves, you must pull a vacuum on the lines to remove all air and moisture. Moisture is the enemy of any A/C system; it can mix with refrigerant to form a corrosive acid that eats away at internal components. This step is absolutely vital for the efficiency and long-term health of your mini-split, so it’s not something you can afford to skip.
Drainage and Safety Gear
Finally, let's talk about managing water and keeping yourself safe. The indoor unit will produce condensation, so you need to install a drain line that slopes downward, allowing gravity to carry the water away outside. An improper drain line can lead to water backing up and causing leaks and damage inside your home. And please, don't forget your safety gear. This is a construction project, so you should always wear protective equipment like safety glasses and gloves. You're working with drills, electrical components, and heavy equipment, so protecting yourself should be your top priority from start to finish.
How to Choose the Right Size and Location
Before you even think about picking up a drill, let's talk about two of the most important decisions you'll make: the size of your mini-split and where you'll put it. Getting these two things right is crucial for your system to run efficiently and keep you comfortable. A perfectly installed unit in the wrong spot or of the wrong size will only lead to frustration and high energy bills. Think of this as the blueprint for your project. It sets the foundation for a successful installation and ensures you get all the benefits of your new system, from consistent temperatures to quiet operation. Taking the time to plan this out carefully will make the hands-on part of the installation go much more smoothly.
How to Size Your Mini-Split
When it comes to mini-splits, bigger isn't better. A unit that's too large will cool the room too quickly and shut off, a process called short cycling. This prevents it from properly dehumidifying the air, leaving your space feeling damp and clammy. On the other hand, a unit that's too small will run constantly without ever reaching the target temperature. To find the right size, you need to consider the room's square footage, ceiling height, insulation quality, and the number of windows. Because our Western Slope climate varies so much, what works in a shaded Grand Junction bungalow might not work for a sunny Telluride home. While online calculators can give you a starting point, consulting with a professional can help ensure you make the best choice for your specific needs.
Where to Place the Indoor Unit
The placement of the indoor unit is all about airflow. You want to install it high on a wall where nothing can block the air it pushes out. Think about where your furniture is, and make sure curtains or tall bookshelves won't get in the way. An ideal spot is on an exterior wall, which makes it easier to run the lines to the outdoor unit. Try to center it in the room to help distribute air evenly. It's also smart to keep it away from major heat sources, like direct sunlight or large electronics, which could confuse the unit's thermostat and cause it to run more than necessary. The key is to select a location that allows for unobstructed airflow, ensuring the system can work efficiently.
Where to Place the Outdoor Unit
Your outdoor unit, or condenser, needs a stable, level spot where it can get plenty of fresh air. A concrete pad is a great foundation. When choosing a location, look for a place that is free from falling leaves, branches, and other debris. You'll also want to protect it from the elements as much as possible, like heavy snow drifts or constant, direct sunlight. While modern condensers are pretty quiet, it’s still a good idea to place it away from bedroom windows or your outdoor patio area. Giving the unit a clear, protected space will help maintain its efficiency and extend its lifespan.
Understanding Clearance Requirements
The outdoor unit needs personal space to work correctly. This "clearance" is the empty area you must maintain around the condenser for it to breathe. If airflow is blocked, the unit can't effectively release heat, forcing it to work harder and less efficiently. As a general rule, you'll want to leave at least a foot of space behind and on the sides of the unit, and several feet of open space in front of it. Always check the manufacturer's installation manual for the exact clearance requirements for your specific model. This not only ensures your system runs properly but also provides enough room for a technician to perform annual professional maintenance down the road.
A Step-by-Step Guide to Installing a Mini-Split
Tackling a mini-split installation yourself is an ambitious project, and I admire the can-do spirit. It’s a rewarding job, but it demands precision, the right tools, and a healthy dose of patience. Think of it less as a single task and more as a series of smaller, crucial projects that all have to be done perfectly for the whole system to work. From mounting the units on the wall to handling electrical wiring and refrigerant lines, each phase has its own set of challenges.
This guide breaks down the core steps involved in a typical installation. It’s designed to give you a clear, high-level overview of what the process looks like from start to finish. Before you begin, always read the manufacturer’s installation manual for your specific model, as instructions can vary. Getting familiar with the entire process will help you decide if this is a project you’re ready to take on.
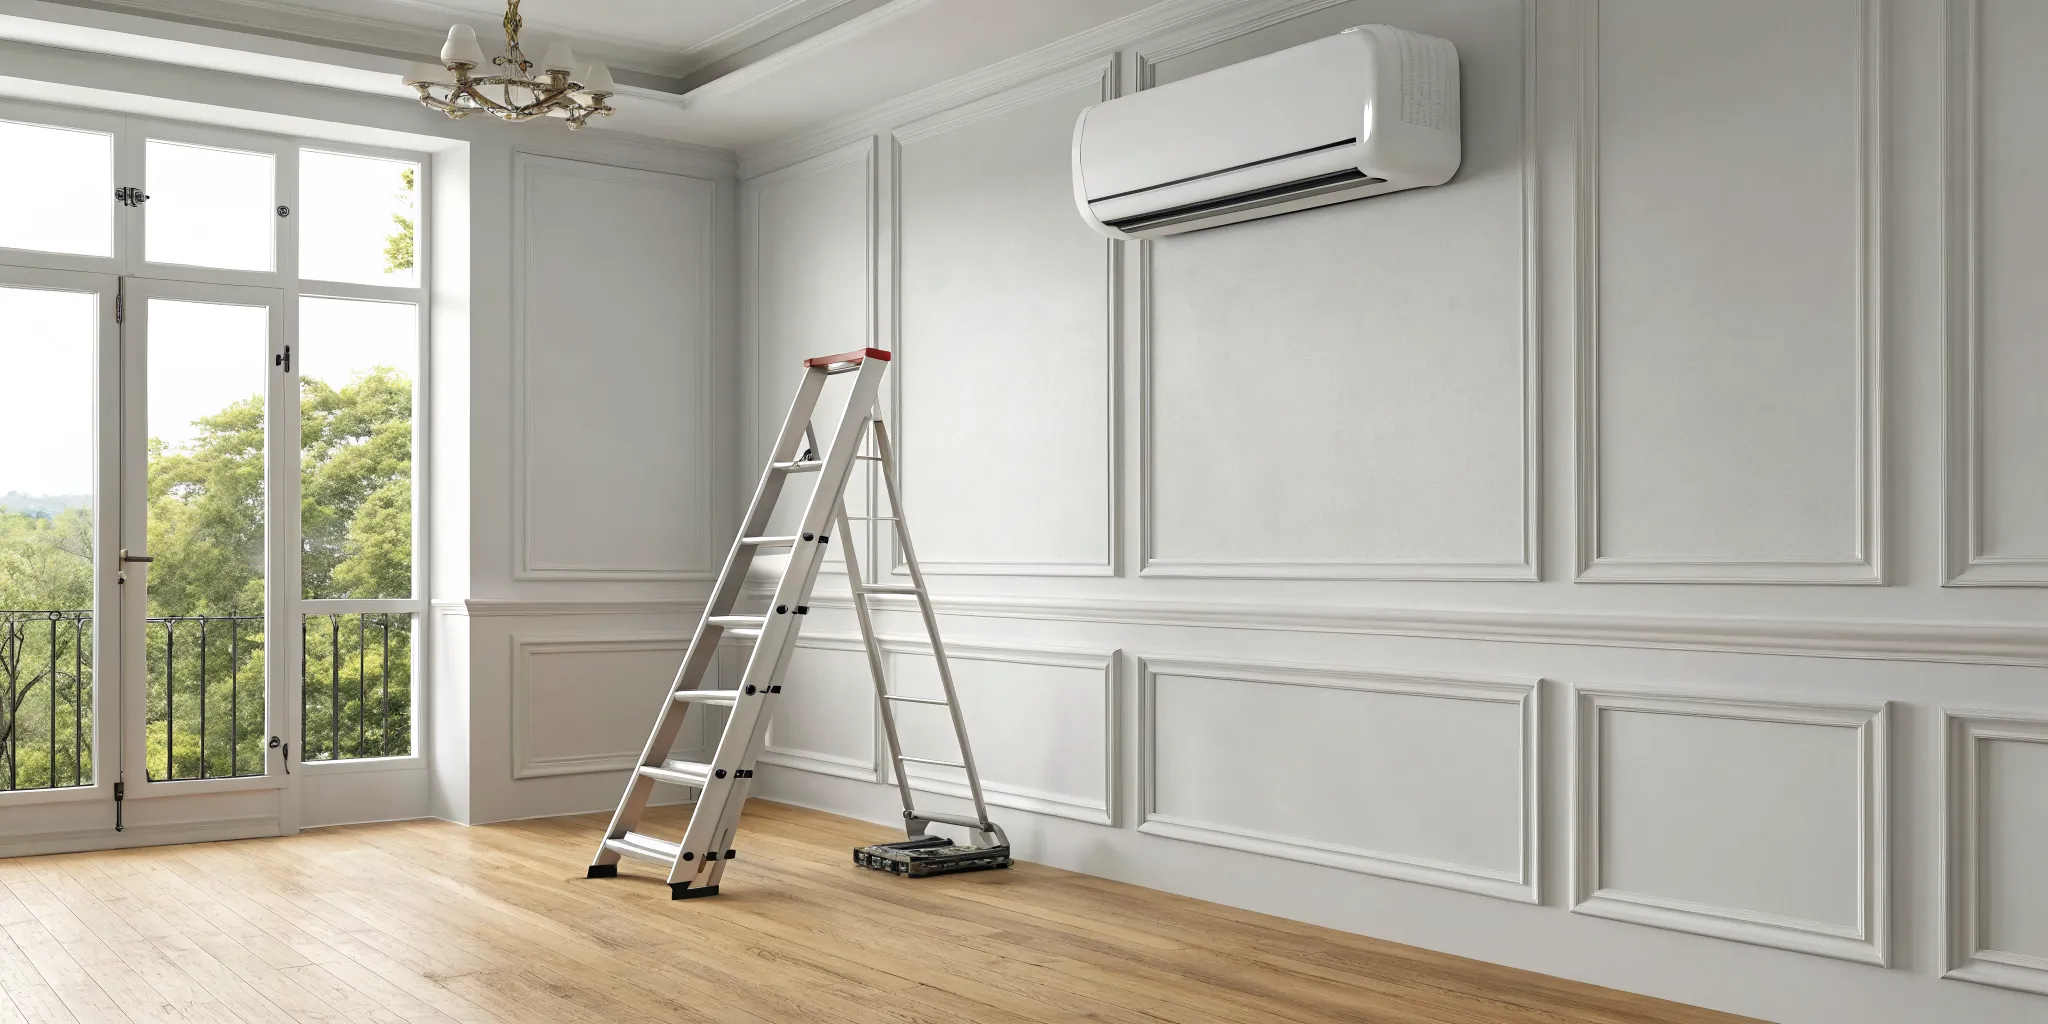
Step 1: Mount the Indoor Unit
First, you’ll need to find the perfect spot for your indoor unit. Choose an interior wall that’s strong enough to hold the unit, placing it about six to seven feet off the floor. Keep it away from direct sunlight and other heat sources. Using a stud finder, locate the wall studs to ensure a secure installation. Once you’ve marked your spot, attach the mounting plate to the wall, using a level to make sure it’s perfectly horizontal. This is crucial for proper drainage later. Finally, you’ll drill a hole, typically around three inches in diameter, through the wall for the line set to pass through to the outdoor unit.
Step 2: Install the Outdoor Unit
Next, it’s time to place the outdoor condenser. This heavy unit needs a solid, perfectly level surface to sit on, like a concrete pad. If a pad isn’t an option, you can use heavy-duty brackets to mount it to an exterior wall. The key here is ensuring proper airflow. You’ll need to maintain at least a foot of clearance around the sides and back of the unit. For homeowners on the Western Slope, it’s also smart to consider snow accumulation. Placing the unit on a stand can keep it above winter snow drifts, ensuring it can function properly when you need it most.
Step 3: Connect and Insulate the Refrigerant Lines
With both units mounted, you can connect them. This involves carefully bundling the copper refrigerant pipes, the electrical control wires, and the condensate drain hose together. This bundle, often called a line set, is then fed through the hole you drilled in the wall. You’ll connect the flared ends of the copper pipes to the corresponding fittings on both the indoor and outdoor units. It’s important to use two wrenches for this step to avoid twisting and damaging the delicate pipes. Once everything is connected, you’ll wrap the entire line set securely in protective tape to insulate it and shield it from the elements.
Step 4: Run the Electrical Wiring
This is often the most intimidating part of the installation, and for good reason. It involves running both communication and power wires. The communication wire connects the indoor unit to the outdoor unit’s terminal block, allowing them to talk to each other. You’ll also need to run a power line from a dedicated circuit in your home’s breaker panel to the outdoor unit. Always follow the wiring diagram in your system’s manual precisely, matching the wire colors exactly to prevent system errors. If you have any hesitation about working with your home’s electrical system, this is the point where calling a licensed HVAC professional is the safest and smartest choice.
Step 5: Set Up the Condensate Drain
As your mini-split cools your home, it also removes humidity from the air. This moisture collects inside the indoor unit and needs a place to go. That’s where the condensate drain line comes in. This line must be installed with a continuous downward slope, allowing gravity to carry the water outside. If the line has any dips or high points, water can get trapped and back up into the unit, potentially causing leaks and water damage inside your home. Make sure the end of the drain line is positioned where water can drain away from your home’s foundation.
Step 6: Vacuum the Lines and Check for Leaks
This step is absolutely critical and requires specialized equipment: a vacuum pump and a manifold gauge set. Before releasing refrigerant into the system, you must remove all air and moisture from the copper lines. Any moisture left in the system can freeze and destroy the compressor. You’ll connect the gauges and pump to the service ports on the outdoor unit and pull a deep vacuum. Once that’s done, you’ll close the valves and let the system sit to see if the pressure holds. If it doesn’t, you have a leak that must be found and fixed before you can proceed.
Step 7: Power On and Test the System
After you’ve confirmed there are no leaks, it’s time for the moment of truth. You’ll use a hex wrench to slowly open the service valves on the outdoor unit, releasing the refrigerant into the system. With the lines charged, you can head to your breaker panel and switch on the power to the unit. Grab the remote, turn the system on, and set it to cool. Check that the indoor unit is blowing cold air and that the outdoor unit is running smoothly without any strange vibrations or noises. Once it’s up and running, scheduling an annual professional tune-up will keep it in top shape.
Common (and Costly) Installation Mistakes to Avoid
A DIY mini-split installation can feel like a major win, but a few common missteps can turn your weekend project into a long-term headache. Getting the details right from the start is the key to an efficient system that lasts for years. Let's walk through the most frequent installation mistakes so you can steer clear of them.
Picking the Wrong Size
It’s tempting to think bigger is better, but when it comes to a mini-split, size is everything. A unit that’s too large for your space will cool the room too quickly and shut off before it has a chance to remove humidity, leaving you with a cold, clammy feeling. On the other hand, a unit that’s too small will run constantly without ever reaching the set temperature, driving up your energy bill.
To find the right fit, you need to consider the room’s square footage, ceiling height, insulation quality, and the number of windows. A proper load calculation is the most accurate way to determine your needs. Getting this step wrong can lead to years of inefficiency and discomfort, so it’s worth taking the time to get it right.
Placing Units in the Wrong Spot
Where you place your indoor and outdoor units directly impacts their performance. The indoor unit should be mounted high on a wall, free from obstructions, so it can distribute air evenly throughout the room. Avoid placing it in direct sunlight or right above a spot where you’ll be sitting, as the direct airflow can be uncomfortable.
The outdoor unit, or condenser, also needs careful placement. It requires plenty of space for airflow, so don’t crowd it with plants or place it under a deck. It should be installed on a stable, level pad and positioned where noise won’t be a bother. Proper unit placement also ensures the condensate drain line can work effectively, preventing water damage.
Mishandling Refrigerant
Refrigerant is the lifeblood of your mini-split, but it’s also a hazardous material that requires careful handling. The copper lines that carry the refrigerant between the indoor and outdoor units can be easily kinked or damaged, leading to leaks. Even a small leak can prevent your system from cooling properly and can cause serious damage to the compressor over time.
Because of the environmental risks, the EPA requires anyone who handles refrigerants to have a special Section 608 certification. Without this training, it’s easy to make a critical error like overcharging or undercharging the system, which can lead to premature failure. This is one area where professional expertise is invaluable.
Skipping the Vacuum and Leak Test
Before releasing refrigerant into the lines, the system must be put under a deep vacuum to remove all air and moisture. This is a non-negotiable step. Any moisture left in the lines can mix with the refrigerant to form a corrosive acid that will eat away at your system from the inside out, leading to a catastrophic failure.
After pulling a vacuum, you must perform a leak test to ensure all your connections are perfectly sealed. Skipping this means you won't know if you have a tiny, slow leak until your system stops cooling weeks or months later. At that point, you’ll be facing a costly repair and a full refrigerant recharge.
Forgetting About Local Permits
Because a mini-split installation involves both high-voltage electrical work and restricted refrigerants, most municipalities require a permit. This isn't just red tape; it’s a measure to ensure the work is done safely and meets local building codes. Homeowners in Mesa, Delta, or Montrose counties should always check with their local building department before starting.
Installing a system without the proper permits can cause problems with your homeowner's insurance and may need to be removed or redone if it’s not up to code. When you work with a professional installer, they handle all the necessary HVAC services and paperwork, giving you peace of mind that the job is done right.
Is a DIY Mini-Split Installation Really Worth It?
The idea of a DIY project can be exciting. You get to learn a new skill, take pride in your work, and hopefully keep some extra money in your pocket. When it comes to installing a mini-split, the appeal of doing it yourself is strong. But this isn’t like assembling a bookshelf or painting a room. A mini-split is a sophisticated piece of equipment, and a successful installation involves electrical wiring, refrigerant handling, and precise measurements. One small mistake can lead to big problems, like poor performance, a damaged unit, or even safety hazards.
Before you add that DIY mini-split kit to your online cart, it’s important to weigh the upfront cost reduction against the potential long-term risks. You need to consider the quality of the equipment, the legal requirements in Colorado, whether you’ll void the warranty, and your own technical skill level. While you might handle the initial setup, a faulty installation could leave you with expensive repair bills down the road. For a system that you’ll rely on for years of comfort, making sure it’s done right from the start is the most important step.
DIY Kits vs. Professional-Grade Systems
When you start looking into DIY mini-splits, you’ll find kits designed specifically for homeowners. These often come with pre-charged line sets, which means the refrigerant is already in the tubing, so you don't have to handle it directly. This definitely simplifies one of the trickiest parts of the installation. However, these kits are not always the same quality as the professional-grade systems installed by HVAC technicians.
Professionals typically work with more durable, efficient, and reliable equipment from trusted brands. For example, as a Daikin dealer, we install systems known for their longevity and performance. While a DIY kit might seem like a good deal initially, a professional-grade unit is built to last and often comes with a more comprehensive warranty, giving you peace of mind that your investment is protected for the long haul.
What Colorado Law Says About Handling Refrigerant
Here’s a critical point many DIY enthusiasts overlook: handling refrigerants is regulated by law. According to the Environmental Protection Agency (EPA), you must be EPA-certified to handle refrigerants, as improper release can harm the ozone layer. While some DIY kits try to get around this with pre-charged lines, any mistake that causes a leak can put you in a difficult position.
Furthermore, most places in Colorado require permits for this kind of electrical work. Installing a mini-split involves connecting high-voltage wiring, which must be done correctly to prevent fire hazards and ensure it’s up to code. In most cases, it's simply not legal to install your own mini-split without the proper licenses and permits. A professional handles all of this, ensuring your installation is both safe and compliant.
Will a DIY Install Void Your Warranty?
Your mini-split’s warranty is your safety net. It protects you from costs associated with manufacturing defects or premature failure. However, most manufacturers state that their warranty is only valid if the system is installed by a licensed HVAC professional. If you install it yourself and something goes wrong, the manufacturer can easily void the warranty, leaving you responsible for the full cost of repairs or even a complete replacement.
Think of professional installation as a way to protect your investment. When a certified technician installs your unit, they follow the manufacturer’s exact specifications. This not only ensures the system runs efficiently but also keeps your warranty intact. If an issue arises later, you’ll be covered. A DIY installation might feel like a win at first, but it could become a very expensive gamble.
When DIY Makes Sense—and When It Doesn’t
So, is there ever a time when a DIY mini-split installation is a good idea? If you are an extremely experienced DIYer with a deep understanding of electrical and HVAC systems, and you’re installing a single, pre-charged unit in a non-critical space like a garage or workshop, you might consider it. Even then, the risks are significant.
For most homeowners, the answer is clear: DIY doesn’t make sense. Amateurs often make critical mistakes, like choosing the wrong size unit for the space, which leads to inefficiency and strain on the system. Other common errors include mishandling refrigerant lines, failing to create a proper vacuum seal, or placing the indoor and outdoor units in spots that restrict airflow. These mistakes can damage the system and shorten its lifespan. For a reliable and efficient system in your home, hiring a professional is always the better choice.
When to Call a Professional for Your Mini-Split Installation
Going the DIY route can feel empowering, but some projects are best left to those with years of training and the right tools. Installing a mini-split system often falls into that category. While a single-zone installation might seem straightforward, there are several scenarios where calling a professional isn't just a good idea, it's essential for your home's safety, efficiency, and your peace of mind. Let's walk through a few situations where you should definitely pick up the phone.
You Need a Multi-Zone System
If you're looking to cool or heat more than one area, you'll need a multi-zone system. This involves connecting multiple indoor units to a single outdoor condenser. While it's a fantastic way to create custom temperature zones throughout your home, it also makes the installation significantly more complex. A professional can properly plan the refrigerant line runs, balance the load between the units, and ensure the entire system works together seamlessly. It's a much more involved process than a simple single-zone setup, and getting it wrong can lead to poor performance and headaches down the road.
You're Uncomfortable with Electrical Work
This is a big one. A mini-split installation requires connecting high-voltage wiring to both the indoor and outdoor units, as well as to your home's main electrical panel. If you're not a licensed electrician, this is risky territory. Improper wiring is a serious fire hazard and can permanently damage your new equipment. Our professional technicians are trained to handle these connections safely and correctly, ensuring your system is powered properly and your home is protected. It’s a critical step where there’s simply no room for error, and it’s always better to prioritize safety.
You're Unsure About Sizing or Placement
Choosing the right size mini-split is about more than just the square footage of your room. A professional considers factors like your home's insulation, the number and type of windows, ceiling height, and even the Western Slope's unique climate. An undersized unit will struggle to keep up, while an oversized one will cycle on and off too frequently, wasting energy and failing to dehumidify properly. Proper placement is also key for airflow and efficiency. A professional can perform a detailed load calculation to find the perfect unit for your space and identify the ideal spot for installation, ensuring you get the comfort you're paying for.
You Want to Ensure It's Up to Code
Many municipalities, including those across Mesa, Delta, and Montrose counties, have specific building codes for HVAC installations. These rules exist to ensure safety and proper function. Installing a mini-split often requires permits for the electrical and refrigerant work. A professional contractor understands the local requirements and will handle the entire permitting process for you. This guarantees your installation is fully compliant with Colorado regulations and will pass any necessary inspections. It’s the best way to protect your investment and ensure the job is done right from a legal and safety standpoint.
Keep Your Mini-Split Running Smoothly
Once your mini-split is up and running, a little regular care goes a long way. Think of it like changing the oil in your car; consistent maintenance keeps your system performing at its best and helps you avoid surprise breakdowns on the hottest or coldest days. Whether you tackled the installation yourself or called in the pros, these simple habits will protect your investment and ensure you stay comfortable all year long. A well-maintained system is more efficient, provides cleaner air, and lasts much longer, giving you peace of mind.
Luckily, keeping your mini-split in top shape isn’t complicated. Most of the work involves simple visual checks and cleaning that you can easily do yourself. For the more technical tasks, having a trusted professional on call is key. By cleaning your filters, checking your drain lines, and scheduling an annual tune-up, you’re setting your system up for a long and productive life. Let's walk through the three most important things you can do to keep your mini-split running smoothly.
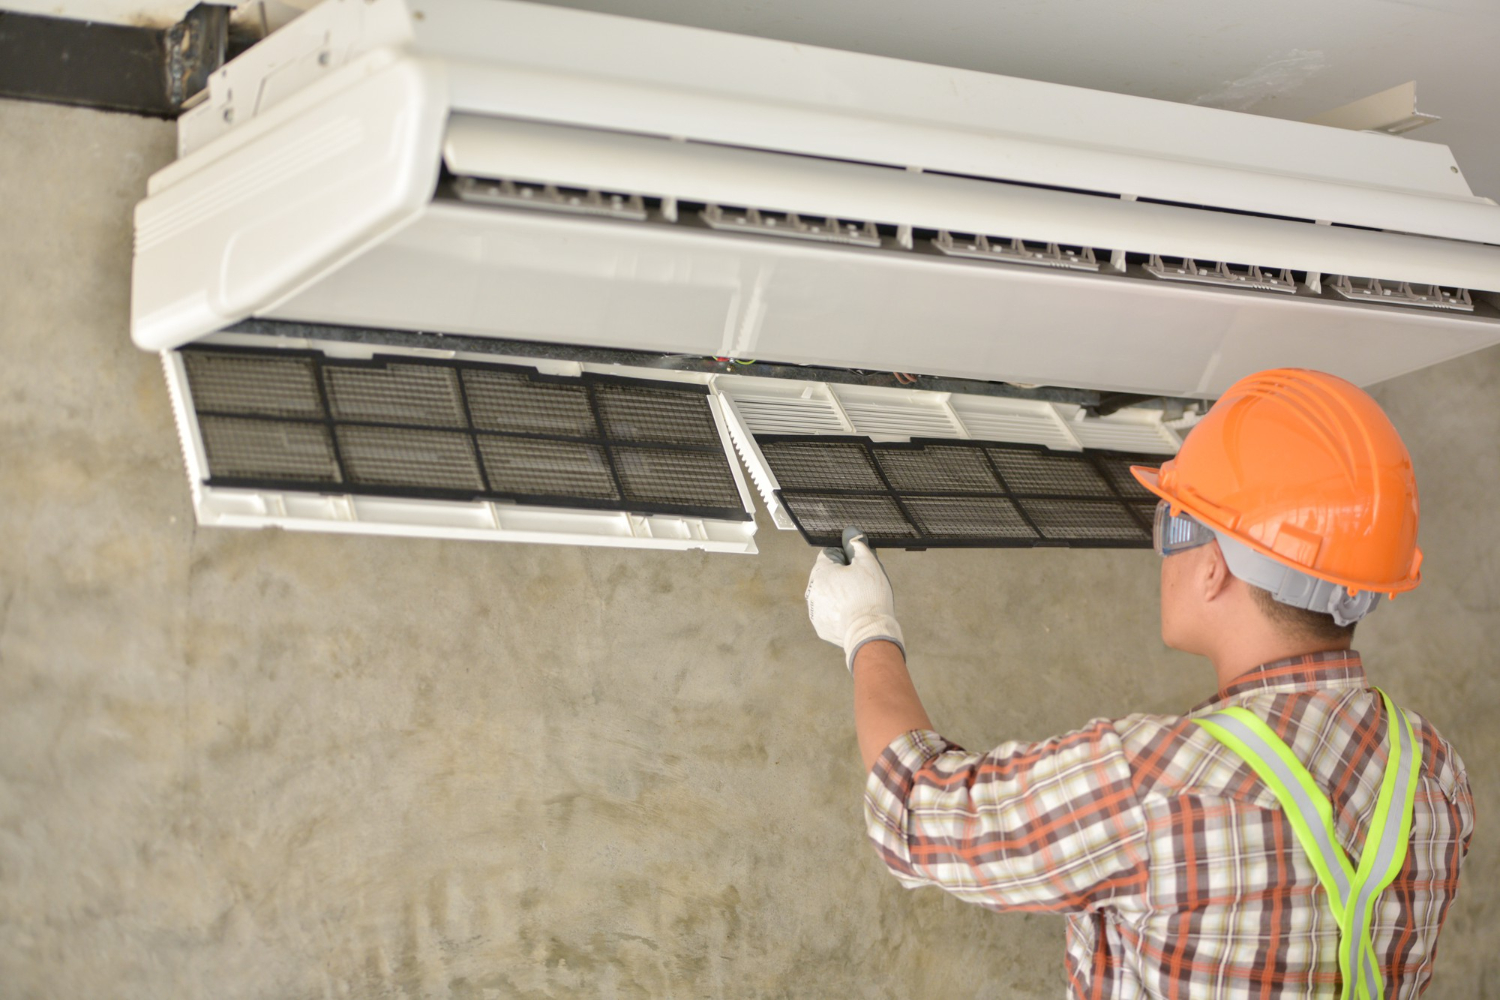
Clean or Replace Your Filters Regularly
Your mini-split’s filters are your first line of defense against dust, pollen, and other airborne particles. Keeping them clean is one of the easiest and most effective maintenance tasks you can perform. When filters get clogged, your system has to work harder to pull in air, which reduces its efficiency and can strain the motor. Clean filters mean better indoor air quality and a healthier home, which is especially important for anyone with allergies. Most mini-split filters are washable and reusable, so you just need to rinse them with water, let them dry completely, and slide them back in. Check them monthly and clean as needed.
Check the Drainage and Refrigerant Lines
Your mini-split removes humidity from the air as it cools, and that moisture needs to go somewhere. A small condensate drain line carries this water outside. It’s important to make sure this line remains clear of any blockages from dirt, insects, or algae. A clogged line can cause water to back up and leak inside your home, leading to potential water damage. While you're outside, also take a look at the insulated refrigerant lines. If you notice oily residue or hear a hissing sound, you might have a leak. Spotting the signs of a refrigerant leak early can prevent bigger issues, but remember that only a certified professional should handle refrigerant.
Schedule Annual Professional Maintenance
While DIY checks are great, nothing replaces an expert tune-up. Scheduling annual professional maintenance is the best way to ensure your mini-split operates safely and efficiently for its entire lifespan. A professional technician can perform a deep cleaning of the indoor and outdoor coils, check refrigerant levels, test electrical connections, and inspect all moving parts for wear and tear. This yearly check-up catches small issues before they turn into expensive repairs, ensuring your system is ready for whatever the Western Slope weather brings. It’s a small investment that provides significant peace of mind and keeps your system running like new.
Related Articles
- Daikin Installation Manual R32 Split Series: A Guide
- Mini Split Cost for 1000 sq ft: A Full Breakdown
Frequently Asked Questions
How much does a mini-split installation typically cost? The final price depends on several things: the size and number of indoor units you need, the brand and efficiency rating of the system, and how complex the installation is. For example, a single-zone system for a small room will be less expensive than a multi-zone system for your whole house. While it can be a significant investment, it's often more affordable than adding central air to a home without existing ductwork. The best way to get an accurate number is to have a professional assess your home and provide a specific quote.
Can a mini-split really heat my home during a cold Colorado winter? Yes, absolutely. Modern mini-splits are incredibly effective heat pumps that work by extracting heat from the outside air and moving it inside. While older models could struggle in freezing temperatures, today's high-efficiency units, especially professional-grade systems, are designed to perform well even on very cold days. For the Western Slope's climate, choosing a model with advanced cold-climate technology ensures you'll stay warm and comfortable all winter long.
I'm pretty handy. Can I really not install a mini-split myself? While it's tempting to tackle the project yourself, installing a mini-split involves skills that go beyond a typical home project, like handling high-voltage electrical wiring and specialized refrigerants. Most manufacturers will void the warranty if the system isn't installed by a licensed professional. Plus, mistakes like improper line sealing or incorrect sizing can lead to poor performance and costly damage. For a system you'll depend on daily, professional installation is the safest way to protect your investment and ensure it runs correctly.
What maintenance do I need to do myself, and what should a professional handle? Your main job is to keep the indoor unit's filters clean. You should check them monthly and wash them when they look dirty. This is simple to do and makes a huge difference in air quality and efficiency. You can also keep an eye on the outdoor unit to make sure it's clear of leaves and debris. Everything else, like checking refrigerant levels, cleaning the coils, and inspecting electrical connections, should be left to a professional during an annual tune-up.
How long does a professional mini-split installation take? The timeline can vary, but a professional team can often complete a standard single-zone installation in just one day. A more complex multi-zone system might take a bit longer, perhaps a day or two. This is because trained technicians have all the specialized tools and experience to work efficiently and correctly. They can mount the units, run the lines, and complete the electrical and refrigerant connections much faster than someone attempting it for the first time.
